ESP8266 Part 4
TCP client
The goal with this article is to show how to set up the ESP8266 as a TCP client. This example can be used to transmit data at a constant rate being acquired by the ESP8266 to a remote TCP server. If your application cannot afford to lose packets or data, this can be a possible solution to implement.
ESP8266 TCP Client
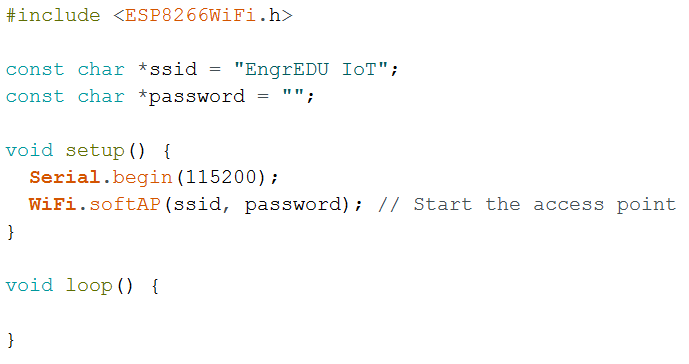
We start by including the code from Part 2 in order to have the ESP8266 set up as an Access Point.
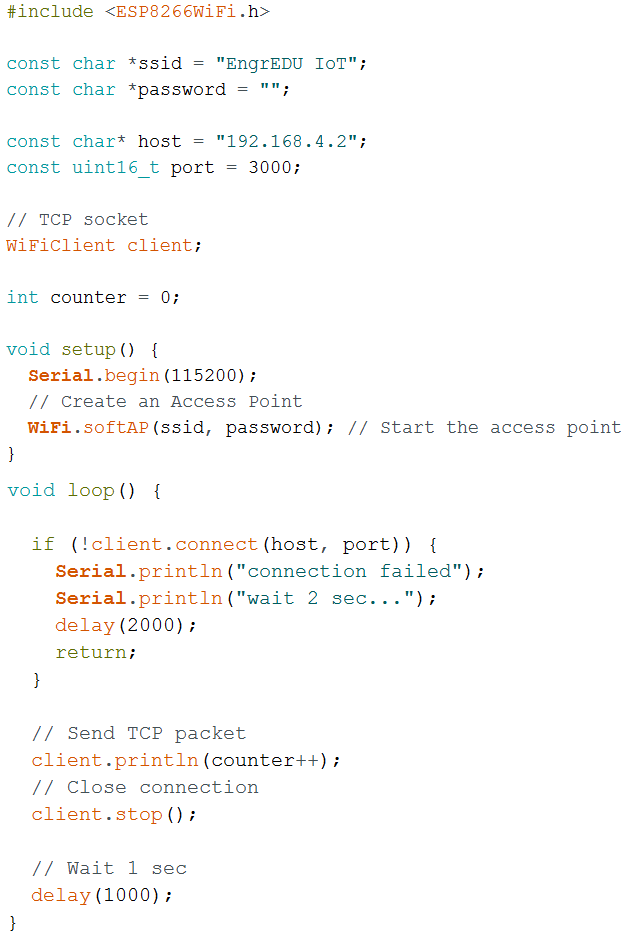
After that we create a TCP socket, and two variables with the IP and port of the remote server that you would like to connect to.

This time we are dealing with a connection oriented protocol. There are different ways to approach the code from here. You can have your application done in a way that you connect only once and send data until you decide to close the socket. For code and protocol simplicity we are connecting to the server for every packet that we send. We are using similar protocol example as the UDP client. We have a counter that is sent over the network every 1 second.
TCP Server (in Python)
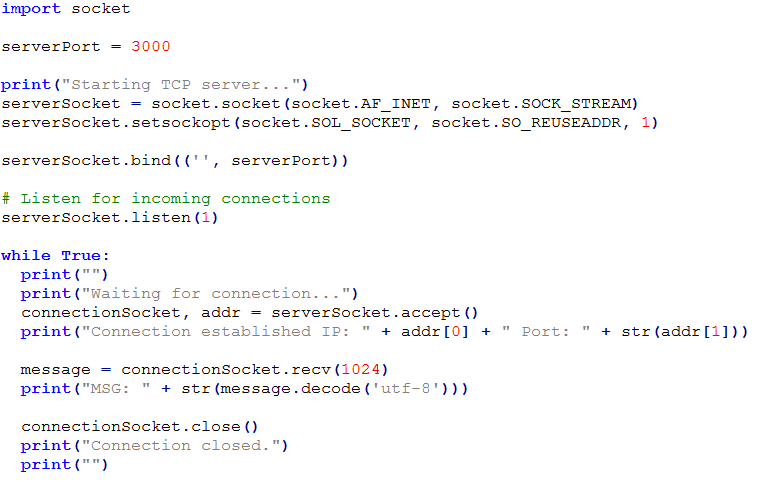
Writing python code, specially code for network communications (UDP and TCP sockets) is outside of the scope of this article. It can be complex to develop a TCP server that handles a variety of different protocols and is robust to protocols or connections issues. However, below you can find a simple TCP server that you can use to test with the ESP8266 TCP client. Have in mind that you should change this code in order to be more tolerant to protocol or connection issues.
A couple of things to have in mind:
- Make sure that your computer is connected to the same WiFi network that you created with the ESP8266 (in this example EngrEDU IoT).
- Check the IP address that was assigned to the device that is being used as the server (computer or raspberry pi). In this example is "192.168.4.2"
- Use that server IP address in your remoteUdpIP variable (in your ESP8266 code).
- Use the same serverPort number (python code) as the number under remoteUdpPort (in your ESP8266 code) - in this case 3000.
- On windows computers you might need to configure your firewall to allow UDP communications to happen under that UDP port.
This should be sufficient to see some action happening. Now all you need to do is to focus on the protocol that you want to use for your application. Instead of sending the counter value, you can send whatever data you would like to.
Note: Outgoing TCP packets are limited to 512 bytes in size (fixed by the protocol).