Simple Qt GUI
There are multiple ways to design graphical user interfaces (GUIs) for python applications.
- PyQt
- TKinter
- Kivy
- wxPython
- PySimpleGUI
- PyForms
- Wax
One of the challenges that I face when designing GUIs, is how hard it becomes to follow code when application code and GUI code are mixed together. Moreover, if I want to change how the GUI looks later in a project, or add new functionalities, it can be tough to adjust the code accordingly.
Note: It might not be a good idea to change a GUI in a project after you wrote a bunch of application code. Make sure that the GUI design pretty much complete before you write any application code, but sometimes changes might need to happen.
For the majority of the GUI interfaces listed above, this "mixture" is inevitable, but this article is going to show how we can use PyQt to separate the application code from the GUI code, in a way that allows the developer to accommodate changes in a GUI or adding new functionalities later in a project, keeping the code "clean" and separated.
Step 0 - Install Qt Creator
If you don't have Qt Creator IDE installed, I recommend installing it first. Qt IDE for open source development is free and available on this link.
Step 1 - Create GUI using Qt Creator
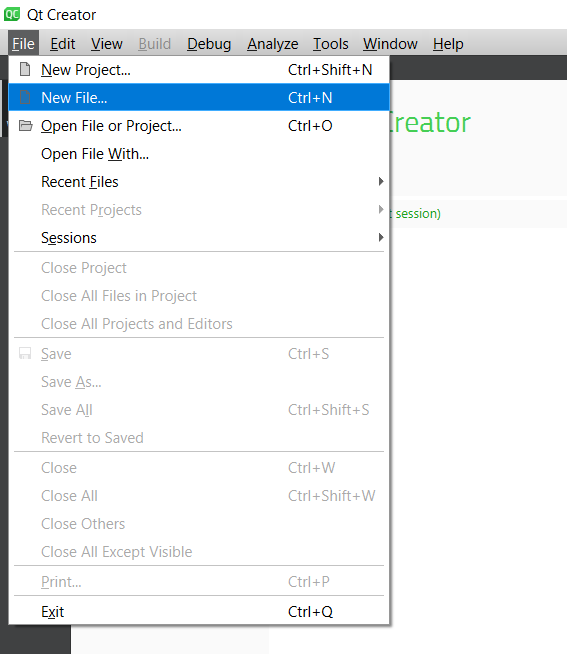
- Open Qt Creator and create a "new file"
- Select "Qt" from "Files and Classes"
- Select "Qt Designer Form"
- Press "Choose..."

- Select "Main Window" from "templates\forms"
- Press "Next"

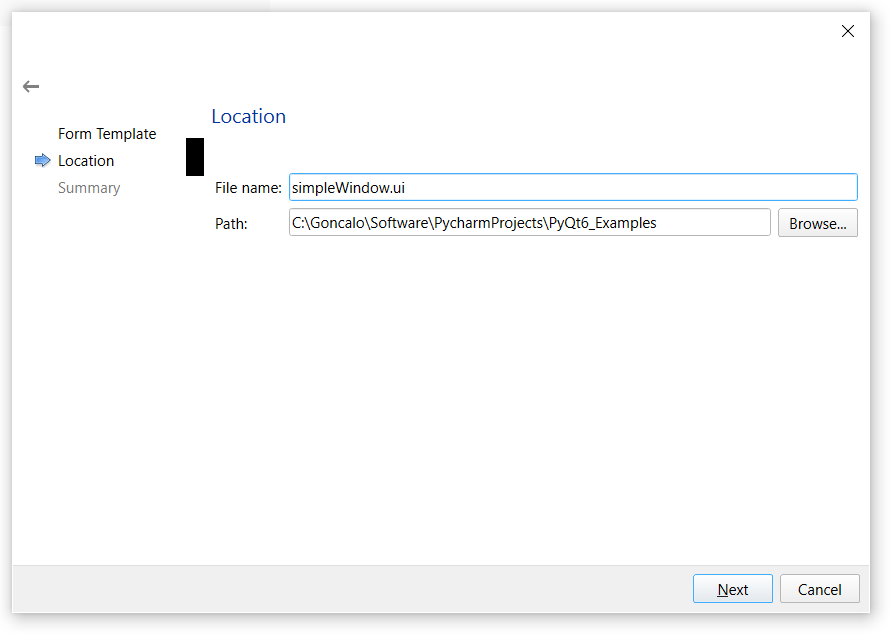
- Name your ui file accordingly
- Save the ui file in the same folder as your python project
- Press "Next" and then "Finish"
- Everything is ready to start designing your GUI.
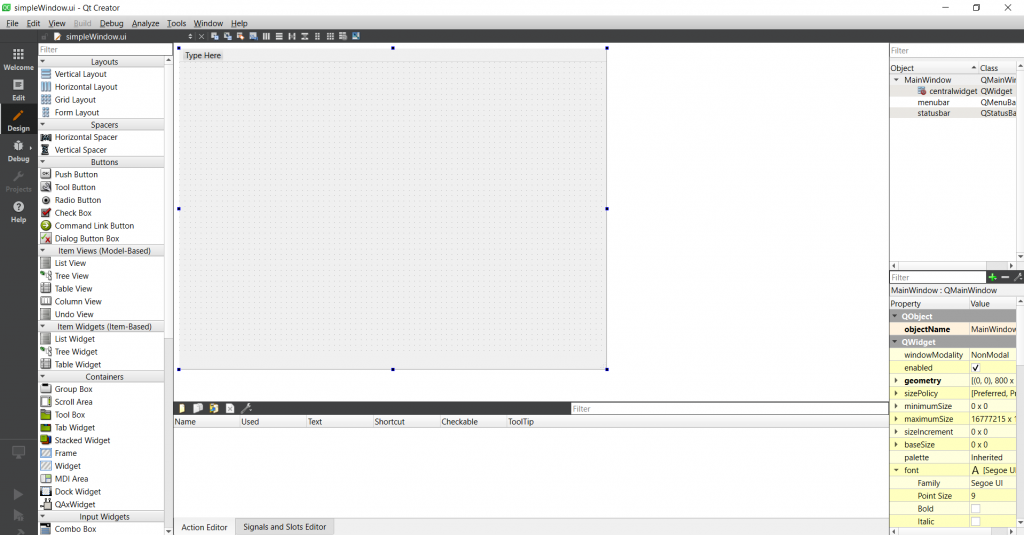
Step 2 - Design the GUI
If you are not familiar with GUI designers
If you are not familiar designing GUIs with IDE's similar to Qt Creator, the learning curve can be a bit overwhelming at first. However, spending some time reading [Ref 1] first, and then complement that reading with some Qt for Python Examples from [Ref 2] and [Ref 4].
There are plenty of videos on YouTube that can help with your learning too. Codemy.com YouTube channel (Link) is a good resource to follow. The majority of the videos in Codemy.com are done for PyQt5, and I will be using PyQt6. For the majority of the GUIs that I normally do, there is no difference on using PyQt5 or PyQt6, however I will leave the differences between these two versions here.
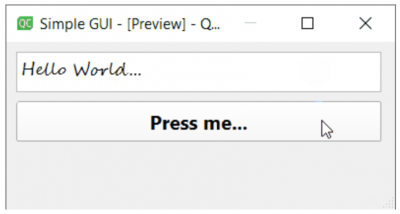
I designed a simple GUI that has the following components:
- textEdit to input some text
- pushButton that will have some functionality defined later
- the statusbar and menubar are included by default on the GUI
Everything done with Qt Creator gets saved under that ui file (xml format) created in step 1. This ui file contains the GUI code that would normally be written in your python code.
Step 3 - Integrate ui File with Python Code
The next step is to integrate the .ui file with the rest of your python code. There are two possible ways to do this step [REF 11].
Option 1: loading the .ui file directly in your code. In your python IDE, make sure that you install PyQT6 python package (Link) before continuing with this section.
The basic code to call your .ui file in your python code is the following:
import sys
from PyQt6 import QtCore, QtGui, QtWidgets, uic
from PyQt6.QtWidgets import QApplication


class MainWindow(QtWidgets.QMainWindow):
    def __init__(self, *args, **kwargs):

        super().__init__(*args, **kwargs)
        uic.loadUi("simpleWindow.ui", self)


if __name__ == "__main__":
    app = QApplication(sys.argv)
    win = MainWindow()
    win.show()
    sys.exit(app.exec())
The main advantage with option 1 is that you don't need to convert the .ui file every time that you make a change on the GUI. On the other hand you don't have access to the object names and respective properties from the GUI while coding. This can be a bit overwhelming specially if you are new to QT Widgets properties and functionalities.
Option 2: converting the .ui file to python. Using option 2 the programmer has access to the GUI objects names and properties but you need to compile the .ui file to python every time that you change the GUI.
There is no right or wrong approach here, pick the option that you feel more comfortable with.
Step 4 - Include the Application Code
Let's include some simple application code by including a callback function to the pushButton component.
import sys
from PyQt6 import QtCore, QtGui, QtWidgets, uic
from PyQt6.QtWidgets import QApplication


class MainWindow(QtWidgets.QMainWindow):
    def __init__(self, *args, **kwargs):
        super().__init__(*args, **kwargs)
        # Load ui File
        uic.loadUi("simpleWindow.ui", self)

        # Callback Functions
        self.pushButton.clicked.connect(self.pushButton_clicked)

    #  --------------------------------
    #  pushButton Callback Function
    #  --------------------------------
    def pushButton_clicked(self):
        text = self.textEdit.toPlainText()

        if text == "":
            self.statusBar().showMessage("Text Edit Empty...")
        else:
            self.statusBar().showMessage(text)


if __name__ == "__main__":
    app = QApplication(sys.argv)
    win = MainWindow()
    win.show()
    sys.exit(app.exec())
Notice on how the application code and the GUI code aren't mix together, which makes it easier to follow the application code.
Step 5 - Add a Component
At last, let's show how to include a new component in the GUI and show how that process doesn't disrupt the application code done so far.
- First, go to Qt Creator and add a new button. I resized the first pushButton and added a pushButton_clear.
- Save the file.
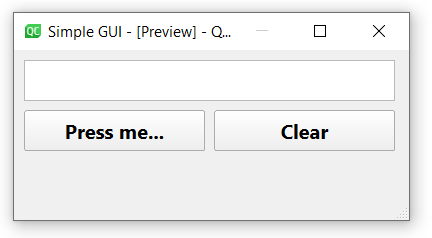
- Go to your python code and add a new functionality for this new button. In my case, if pushButton_clear is pressed, it will clear the textEdit box.
import sys
from PyQt6 import QtCore, QtGui, QtWidgets, uic
from PyQt6.QtWidgets import QApplication


class MainWindow(QtWidgets.QMainWindow):
    def __init__(self, *args, **kwargs):
        super().__init__(*args, **kwargs)
        # Load ui File
        uic.loadUi("simpleWindow.ui", self)

        # Callback Functions
        self.pushButton.clicked.connect(self.pushButton_clicked)
        self.pushButton_clear.clicked.connect(self.pushButton_clear_clicked)

    #  --------------------------------
    #  pushButton Callback Function
    #  --------------------------------
    def pushButton_clicked(self):
        text = self.textEdit.toPlainText()

        if text == "":
            self.statusBar().showMessage("Text Edit Empty...")
        else:
            self.statusBar().showMessage(text)

    #  --------------------------------
    #  pushButton_clear Callback Function
    #  --------------------------------
    def pushButton_clear_clicked(self):
        self.textEdit.setPlainText("")


if __name__ == "__main__":
    app = QApplication(sys.argv)
    win = MainWindow()
    win.show()
    sys.exit(app.exec())
Hopefully this example shows how easy it is to keep the application code and GUI code separate from each other, making code development with GUI less overwhelming when things start getting more complex.
References
- [Ref 1] “Qt Designer and Python: Build your GUI Applications Faster”, realpython.com [Article]
- [Ref 2] “Qt for Python”, doc.qt.io [Website]
- [Ref 3] “Codemy.com”, YouTube Channel
- [Ref 4] “PyQt Tutorial”, tutorialspoint.com [Website]
Other
- [Ref 5] “How To Load PYQT5 Designer UI File”, Codemy.com [YouTube Video]
- [Ref 6] “How To Open A Second Window”, Codemy.com [YouTube Video]
- [Ref 7] “Pass Data Between Windows”, Codemy.com [YouTube Video]
- [Ref 8] “Embedding custom widgets from Qt Designer”, pythonguis.com [Article]
- [Ref 9] “Creating additional windows”, pythonguis.com [Article]
- [Ref 10] “Implementing a background process using QThread”, Mike Miller Channel [YouTube Video]
- [Ref 11] “First steps with Qt Designer”, pythonguis.com [Article]