Create New Project
Create New Project
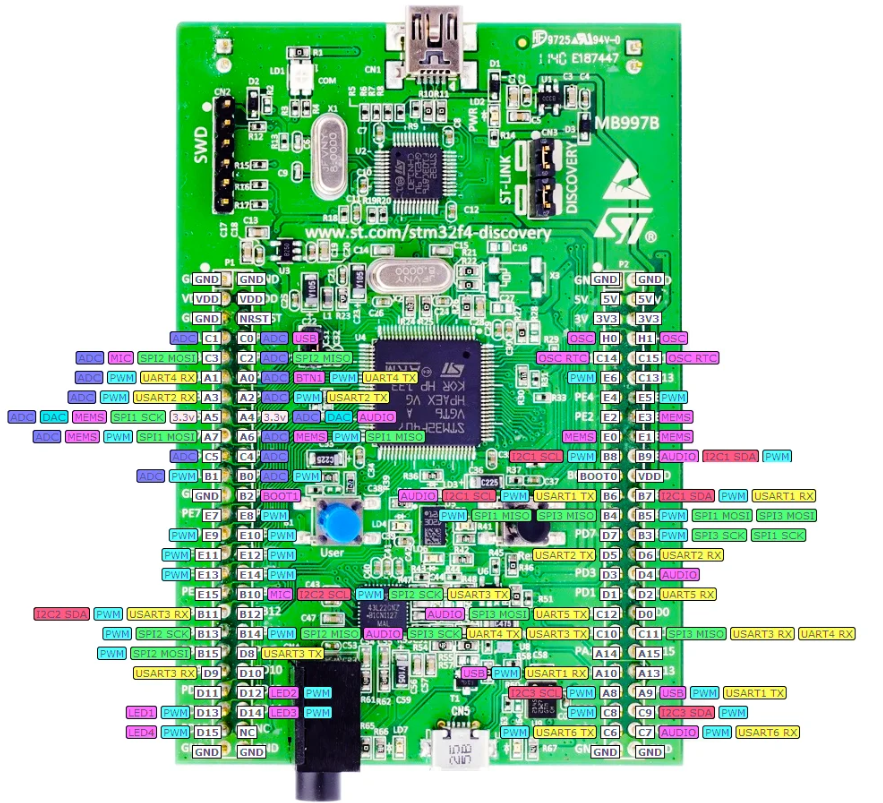
This section will show how to create a project for the STM32F407G development kit.
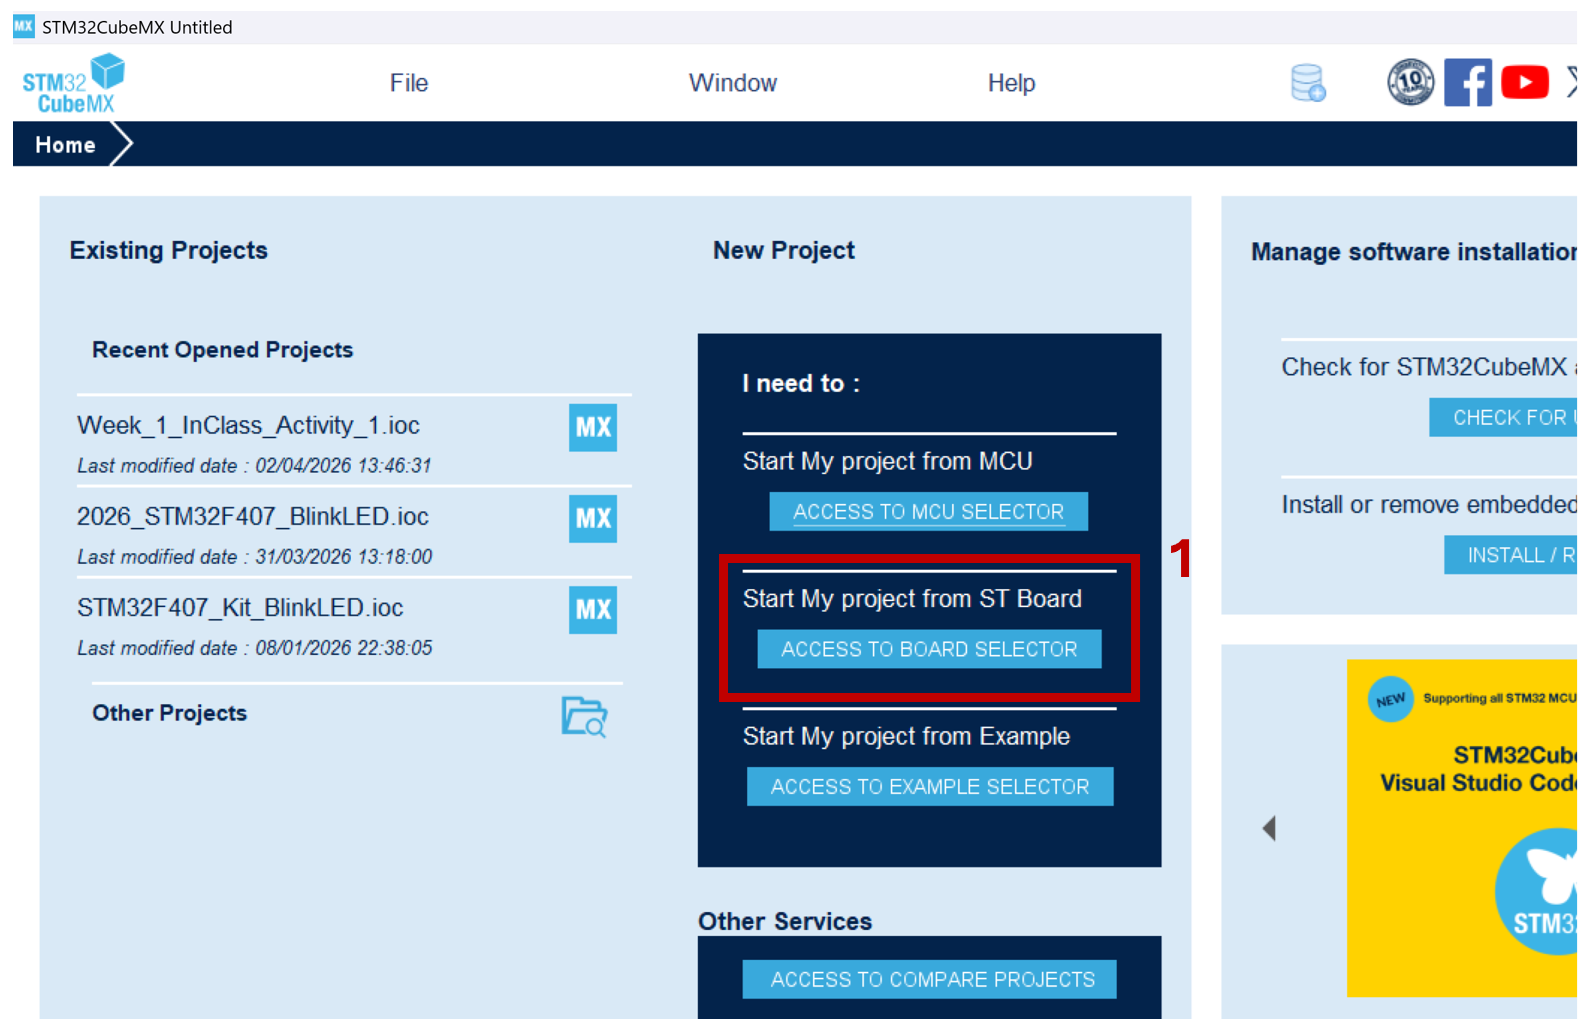
- Open STM32CubeMX and select "Access to Board Selector"
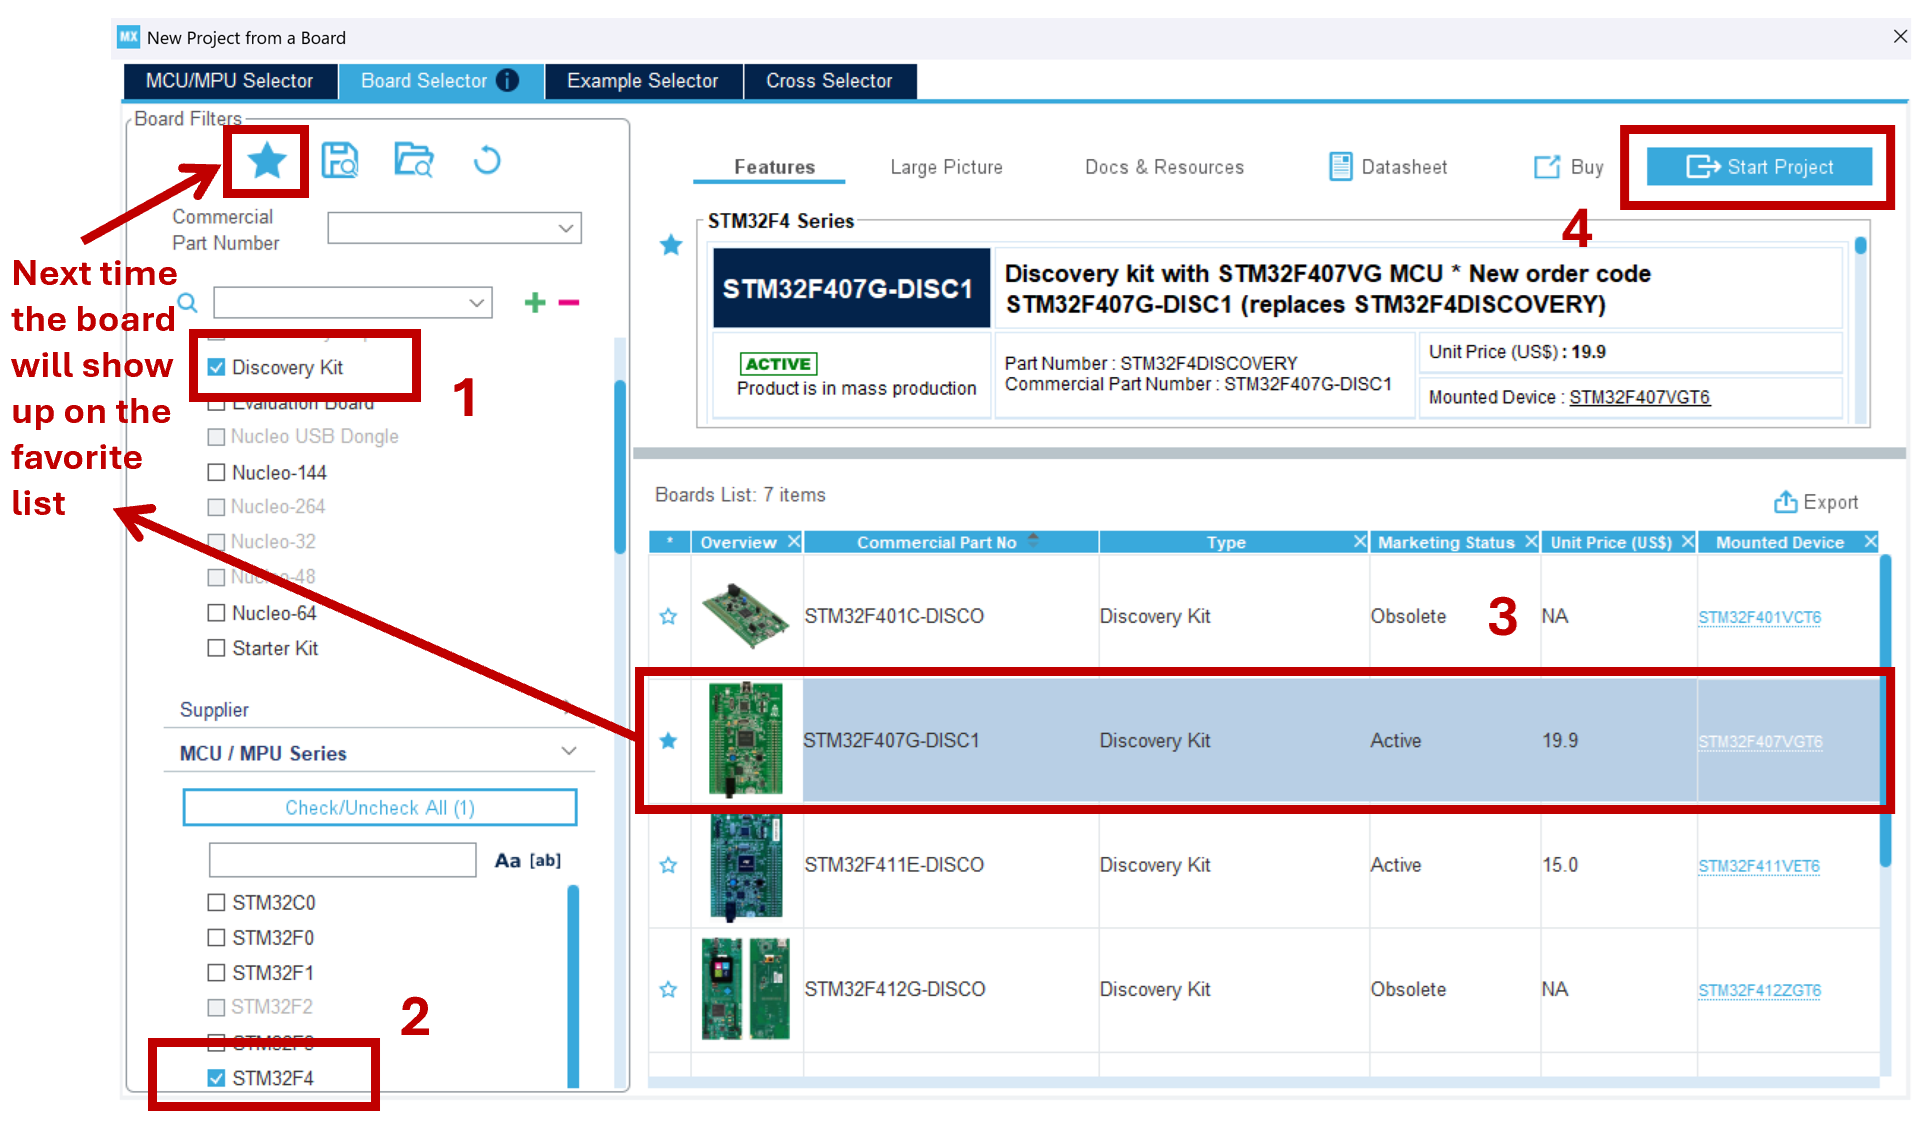
- Filter the boards by:
- Type: Discovery Kit
- MCU/MPU Series: STM32F4
- Select the STM32F407G
- If you enable the blue start right next to it, next time the board will show up on the favorites list.
- Press "Start Project" and say yes to initialize the board with the default peripherals
- Let's create a project that reads a GPIO pin and turns on and off an LED accordingly.
- Click on the GPIO pin that you want to use and select "GPIO_Input"
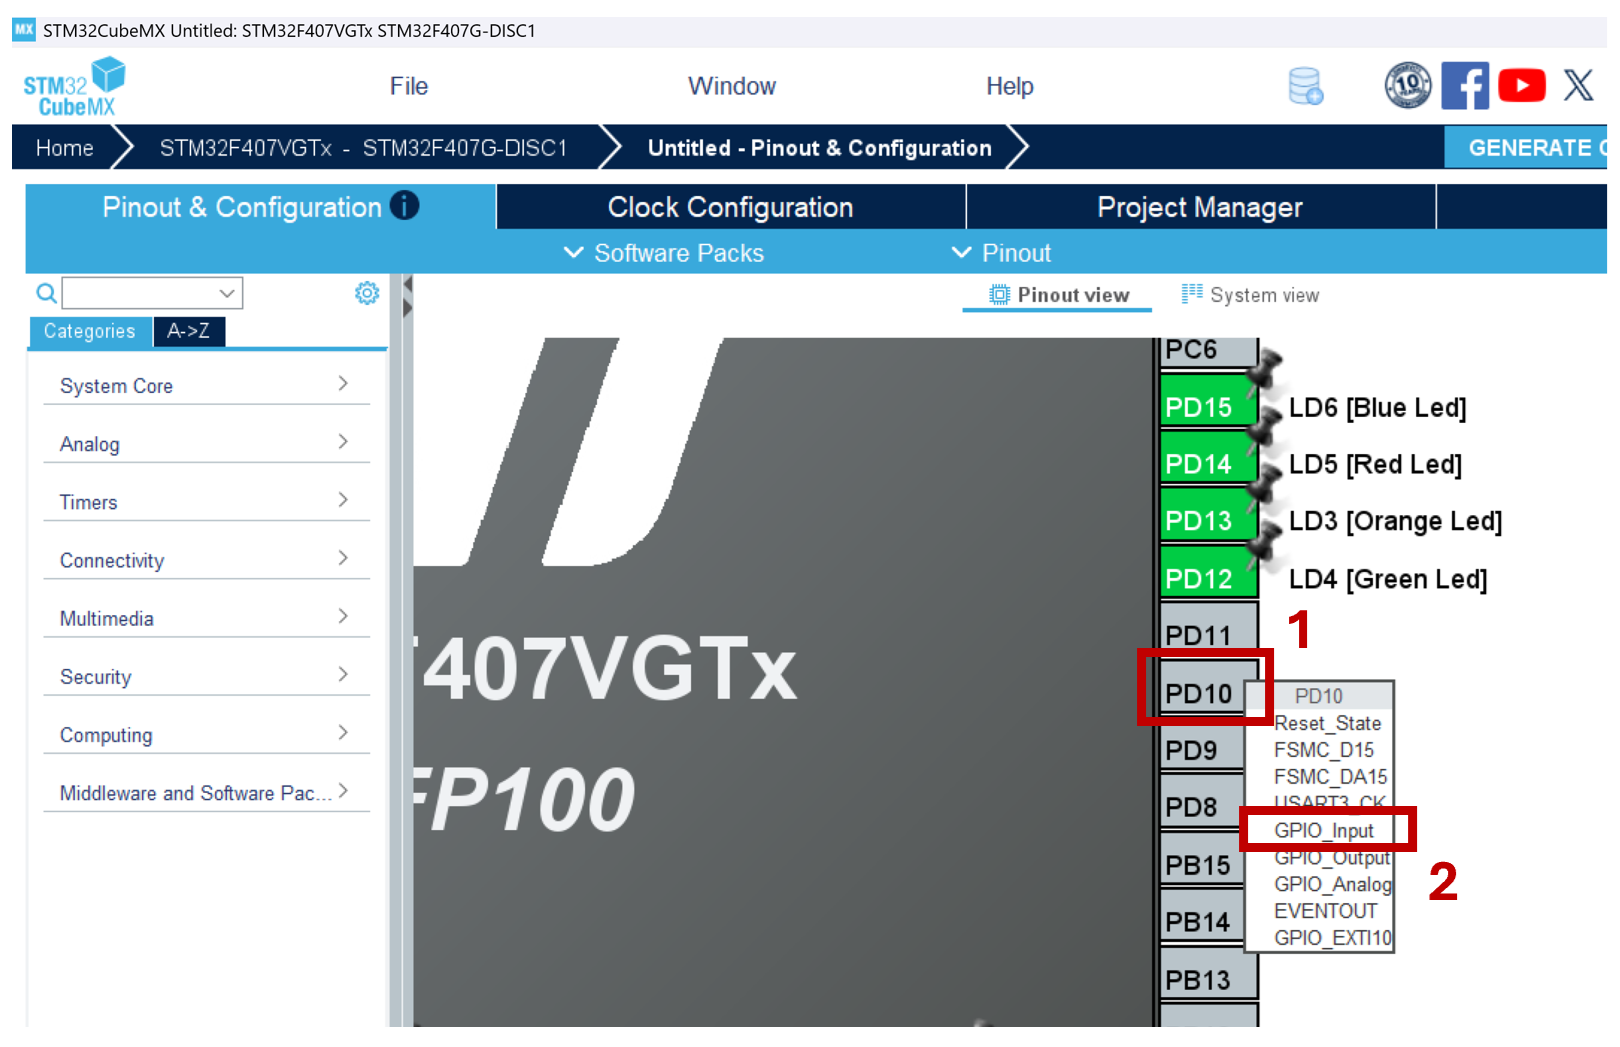
- Right click on the GPIO and select "Enter User Label" if you want to change the name of the pin for something else more descriptive.
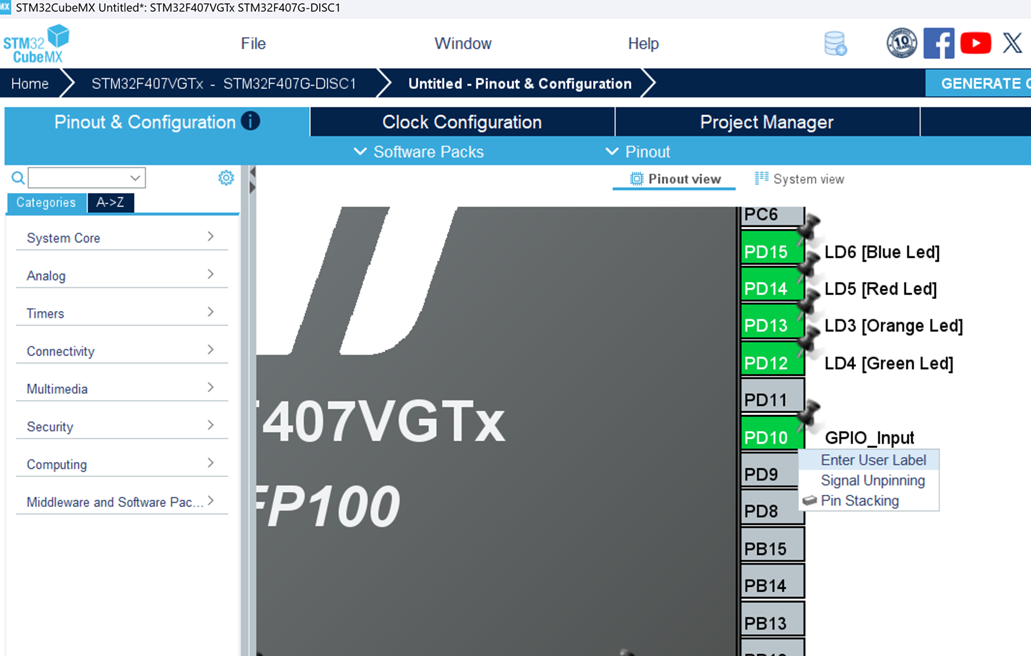
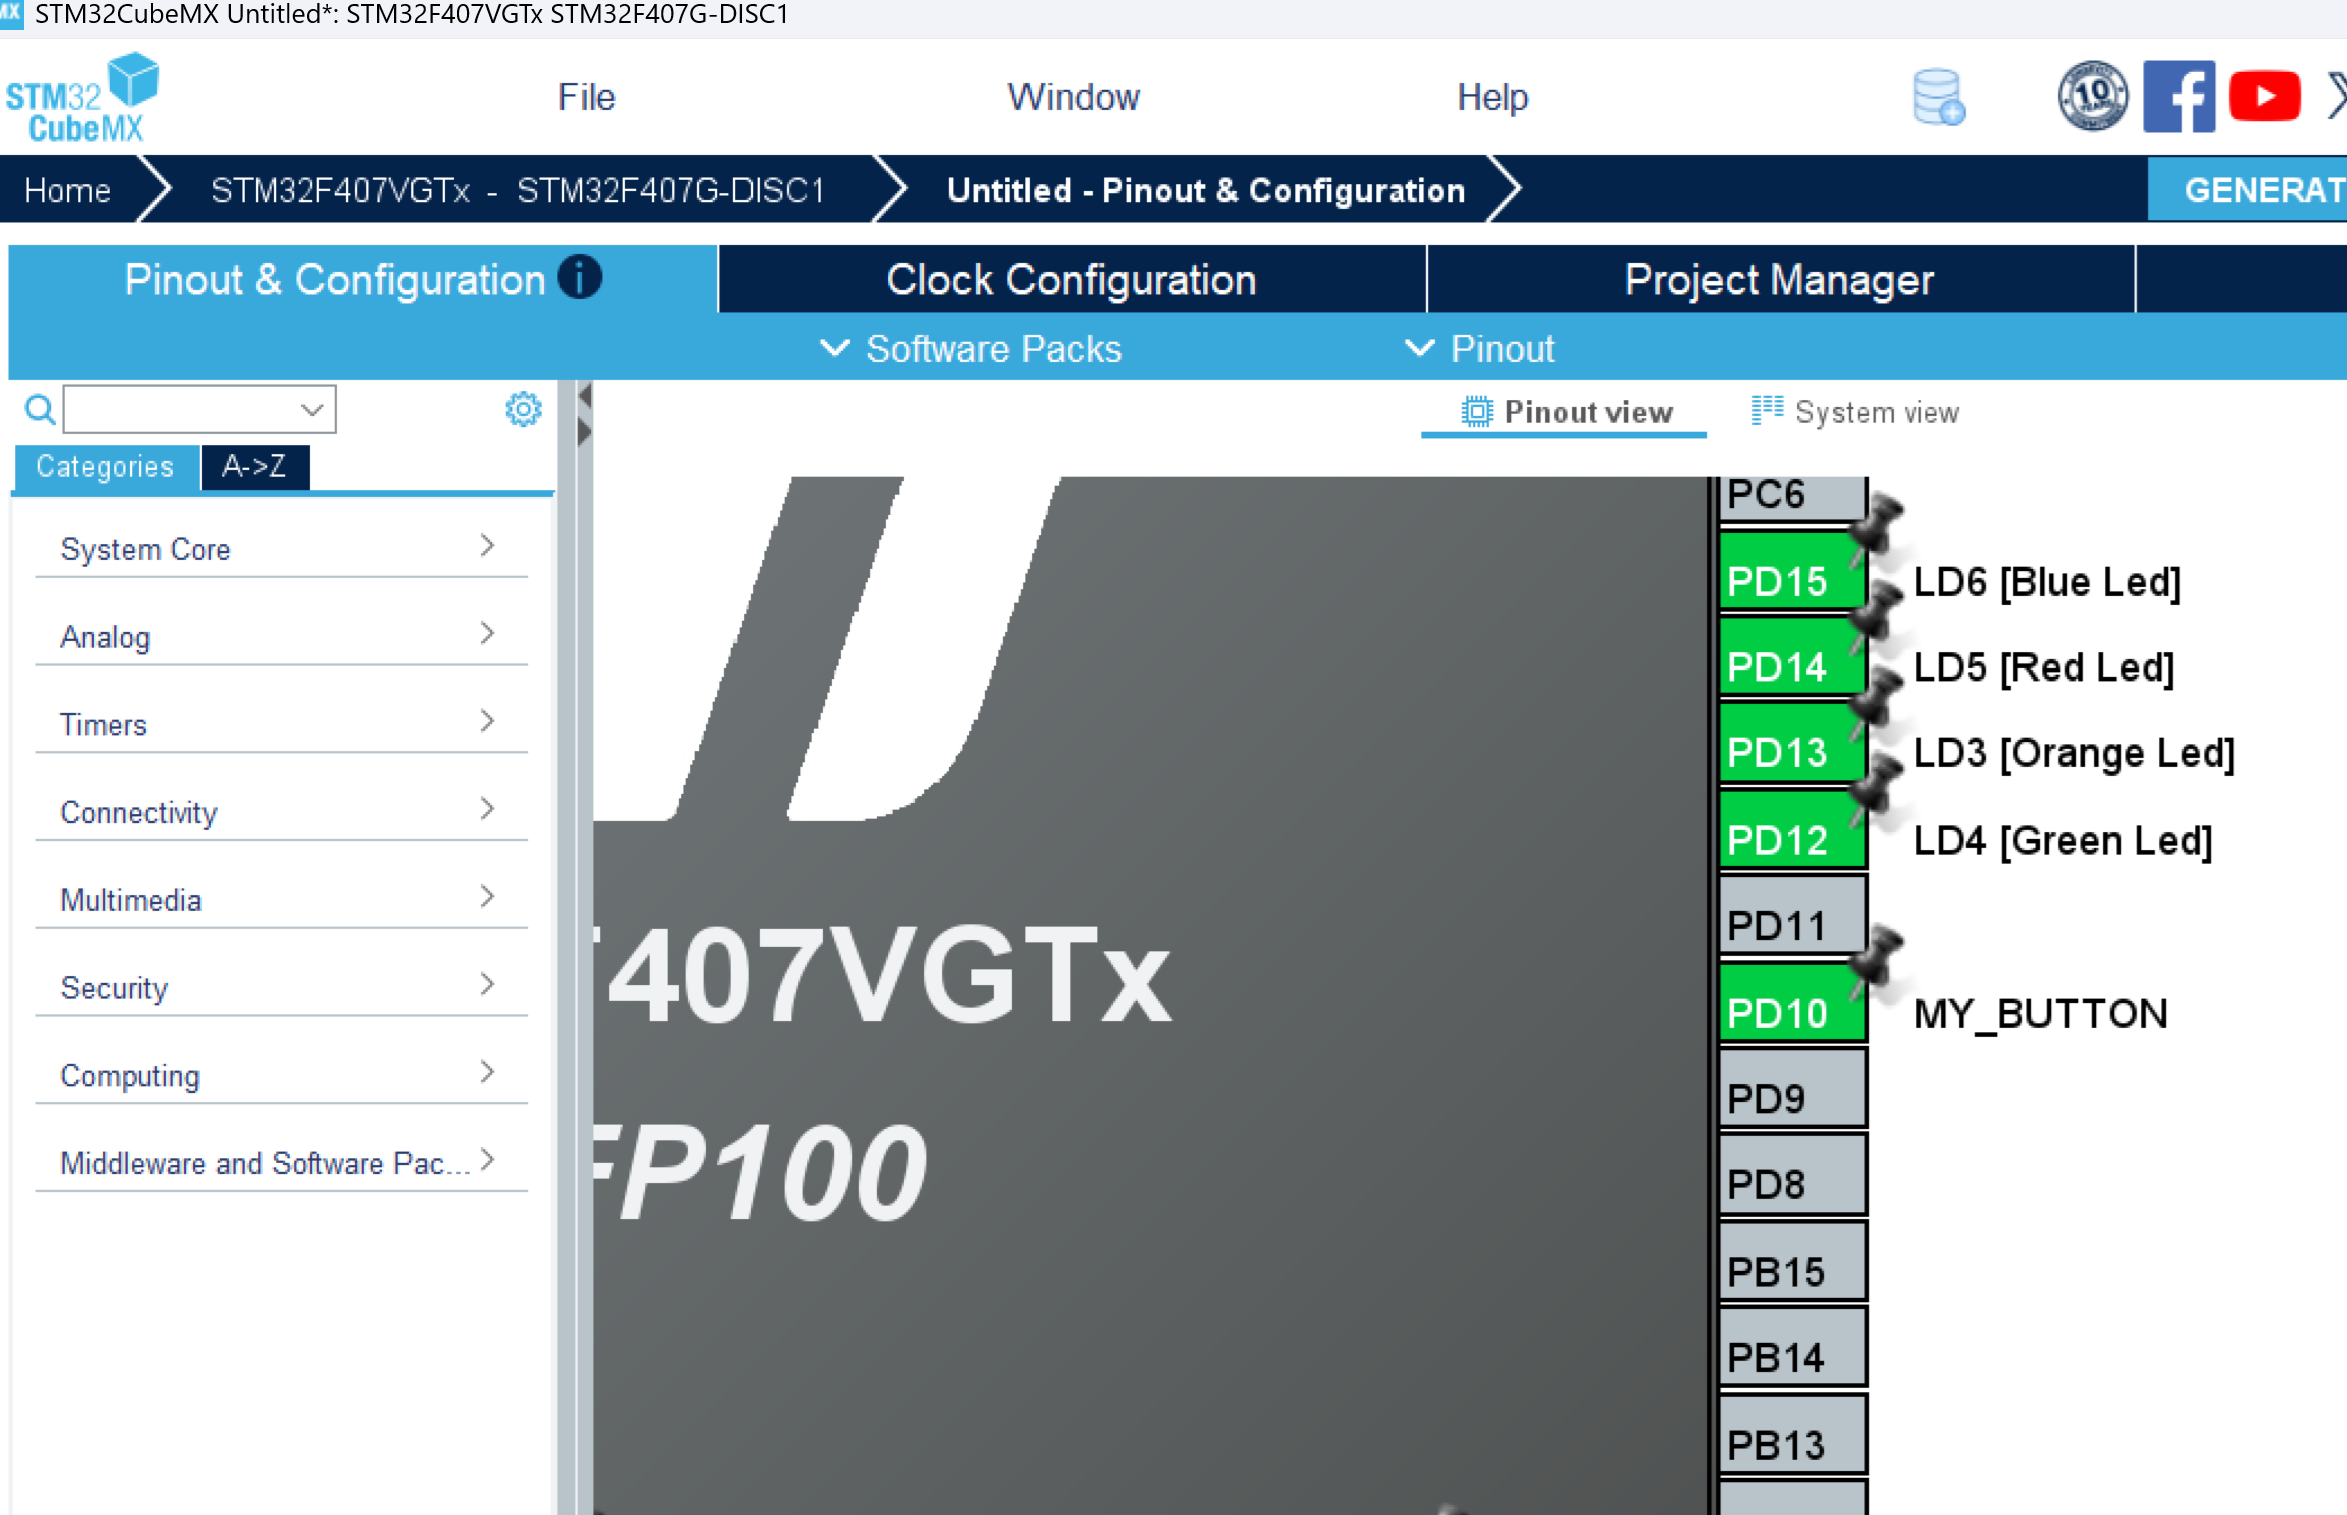
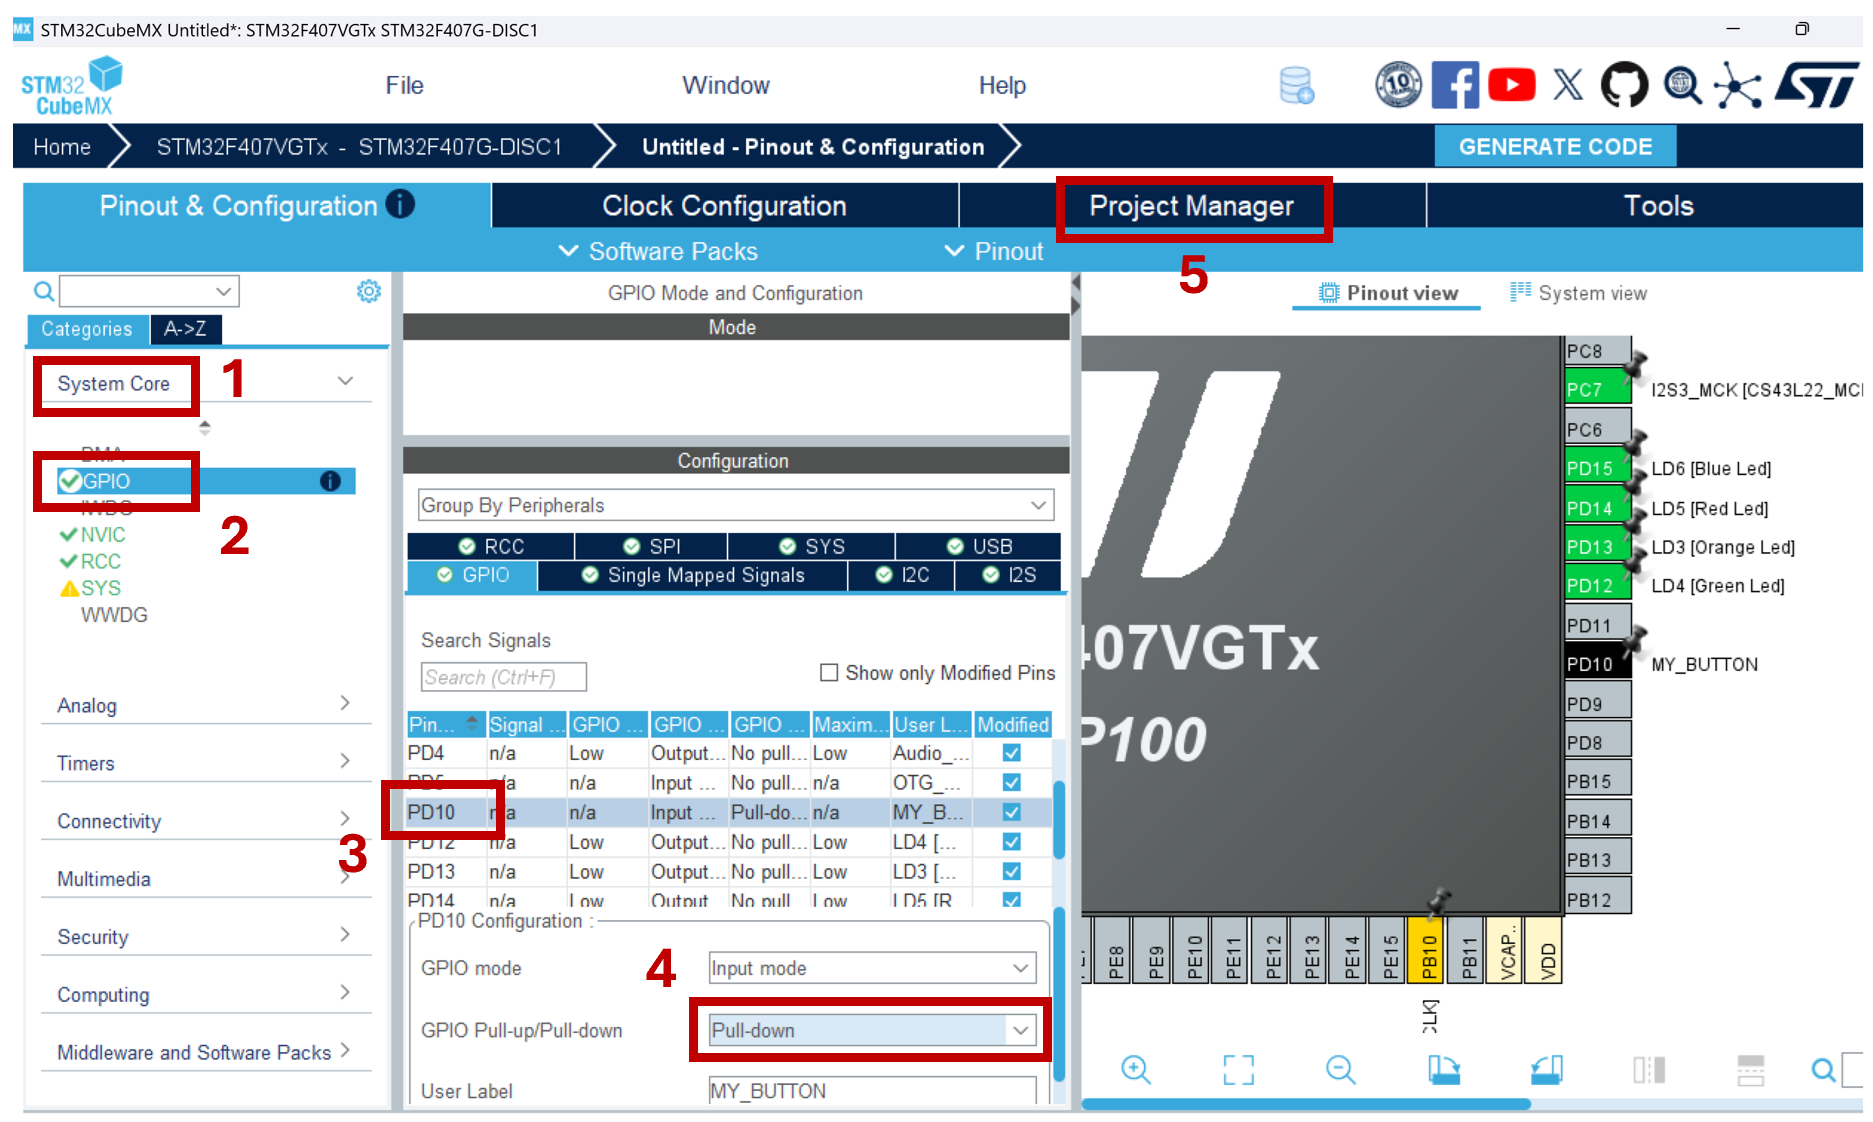
- Since we are going to use this button as an input button, let's make sure that we enable the internal pull down resistor to avoid leaving the pin floating.
- Expand the "System Core" menu
- Select "GPIO" and find the button that you are working with (in this case PD10)
- Under "PD10 Configuration" select "Pull-down"
- We don't have anything else to parameterize then press the "Project Manager" tab.
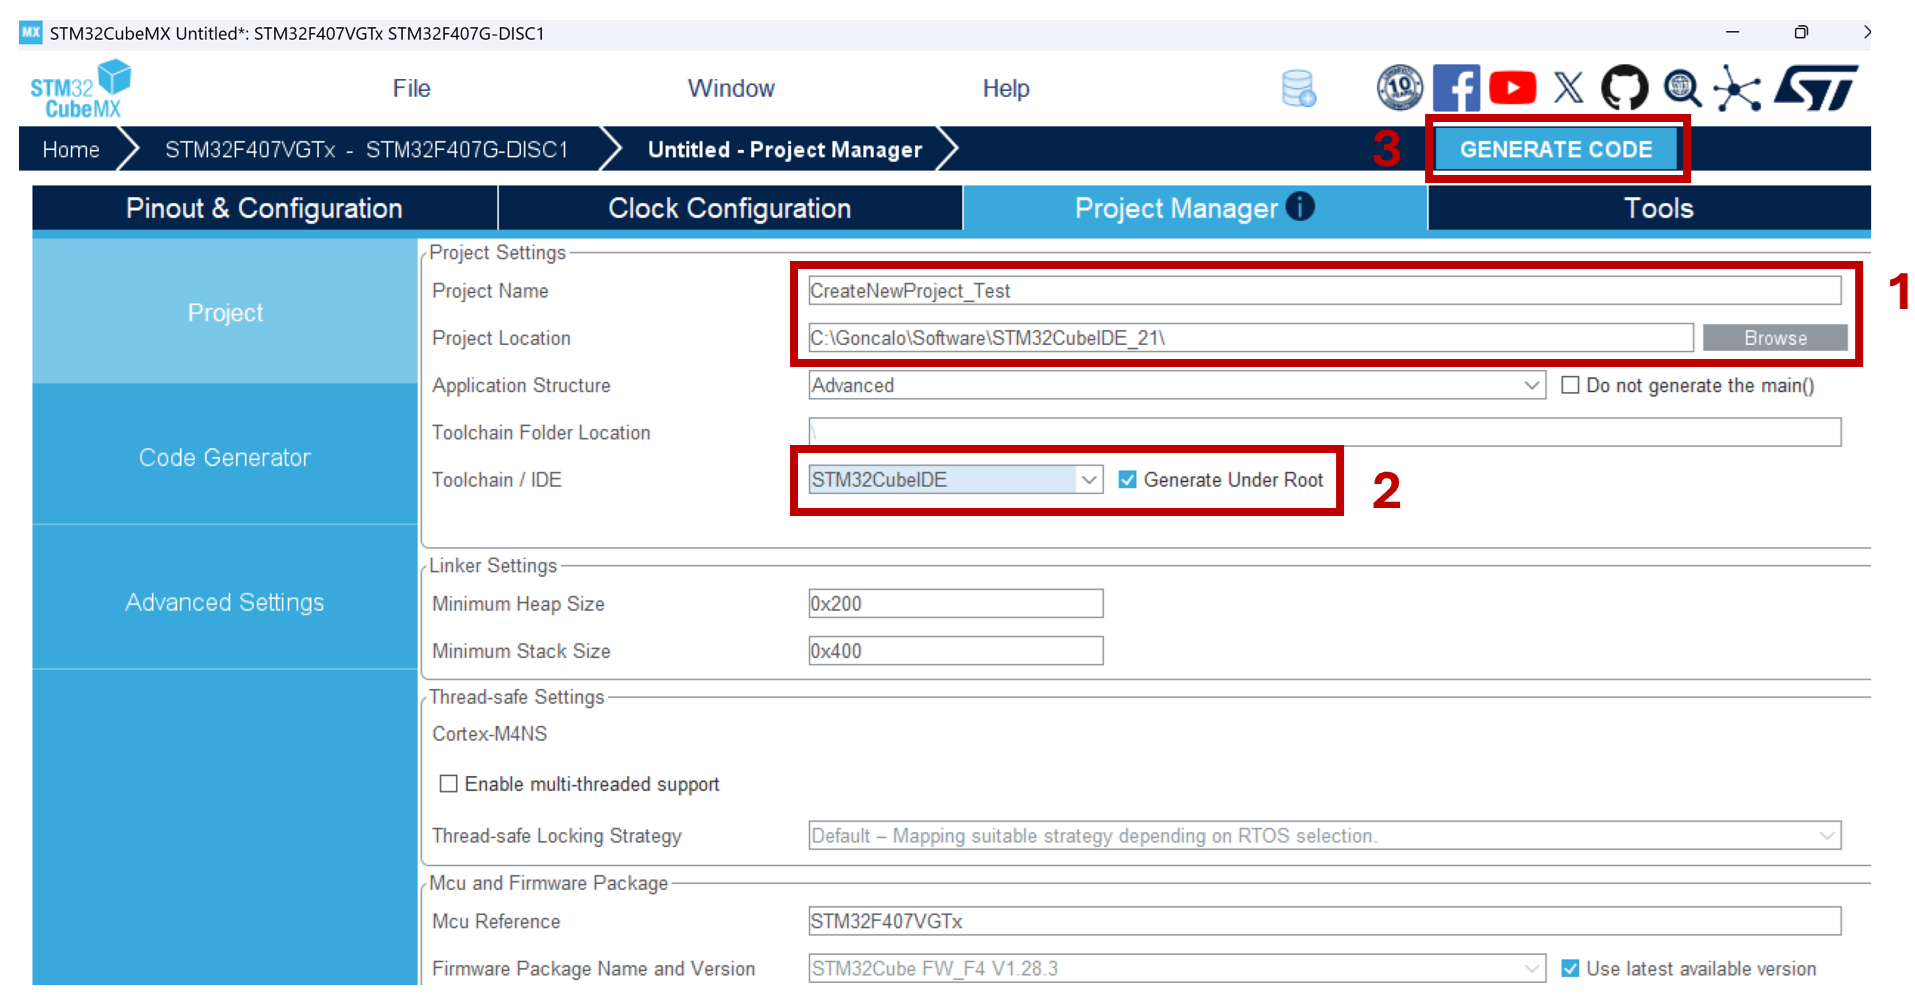
- Give a name to your project and make sure that it is being saved under the directory where your STM32CubeIDE workspace was created.
- Switch the toolchain IDE to STM32CubeIDE
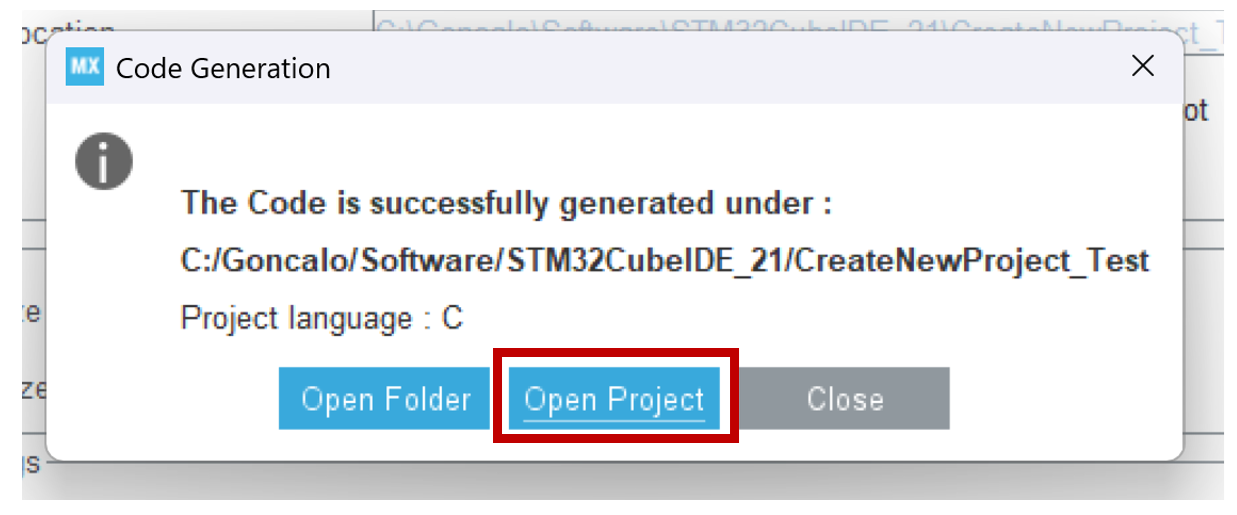
- Press "Generate Code"
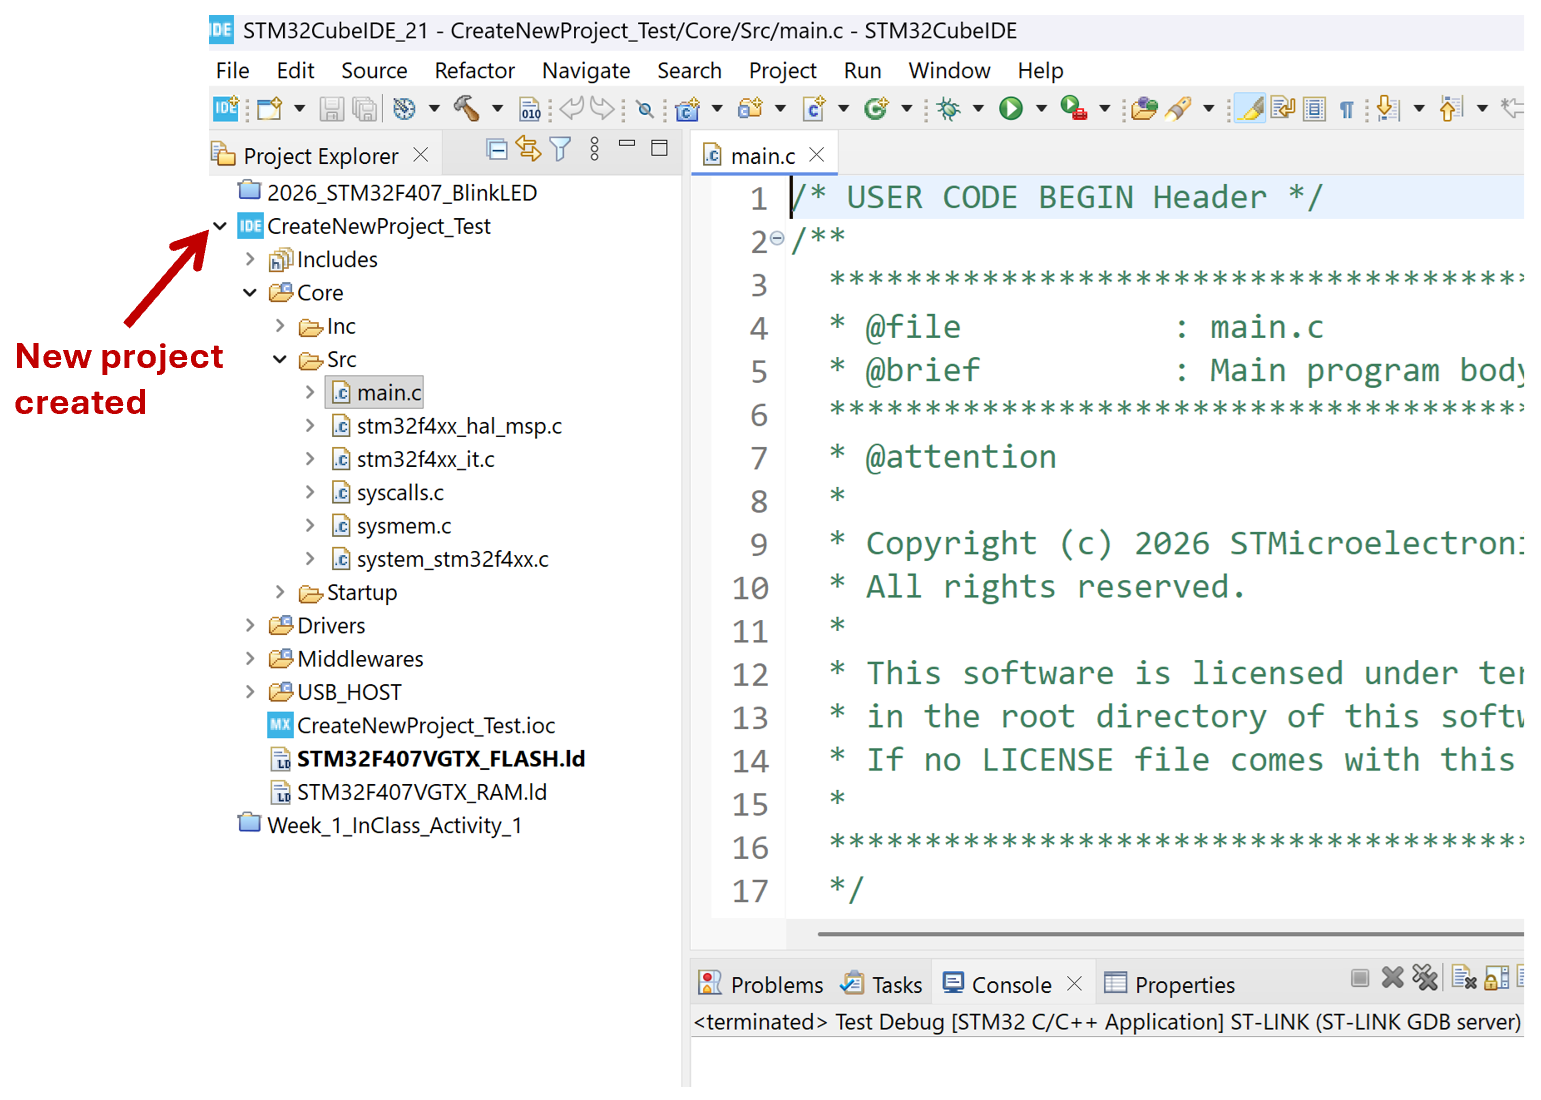
- If you have STM32CubeIDE open and you press "Open Project", the project will show up under the "Project Explorer" tab.
Code Example
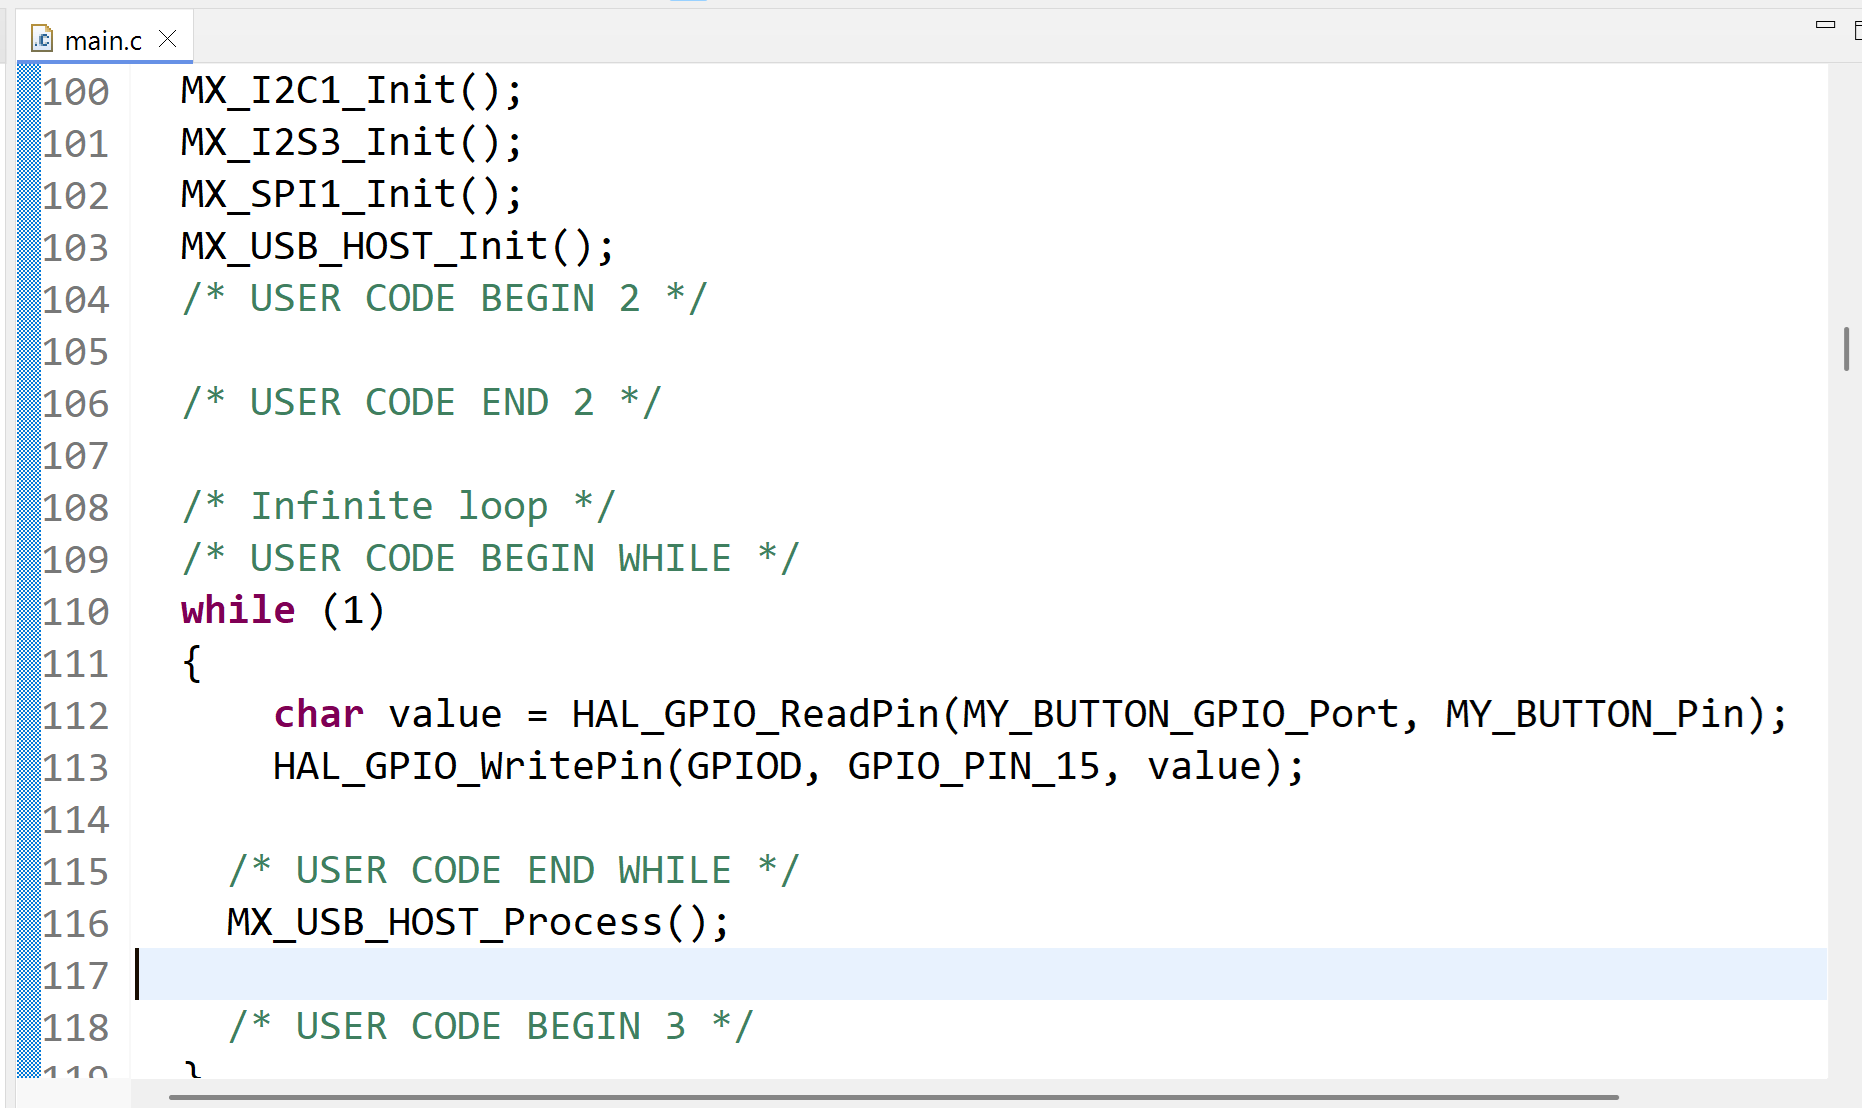
- To read the button and turn on/off the LED accordingly write the code below under the while loop.
- Compile and deploy the code into the board.
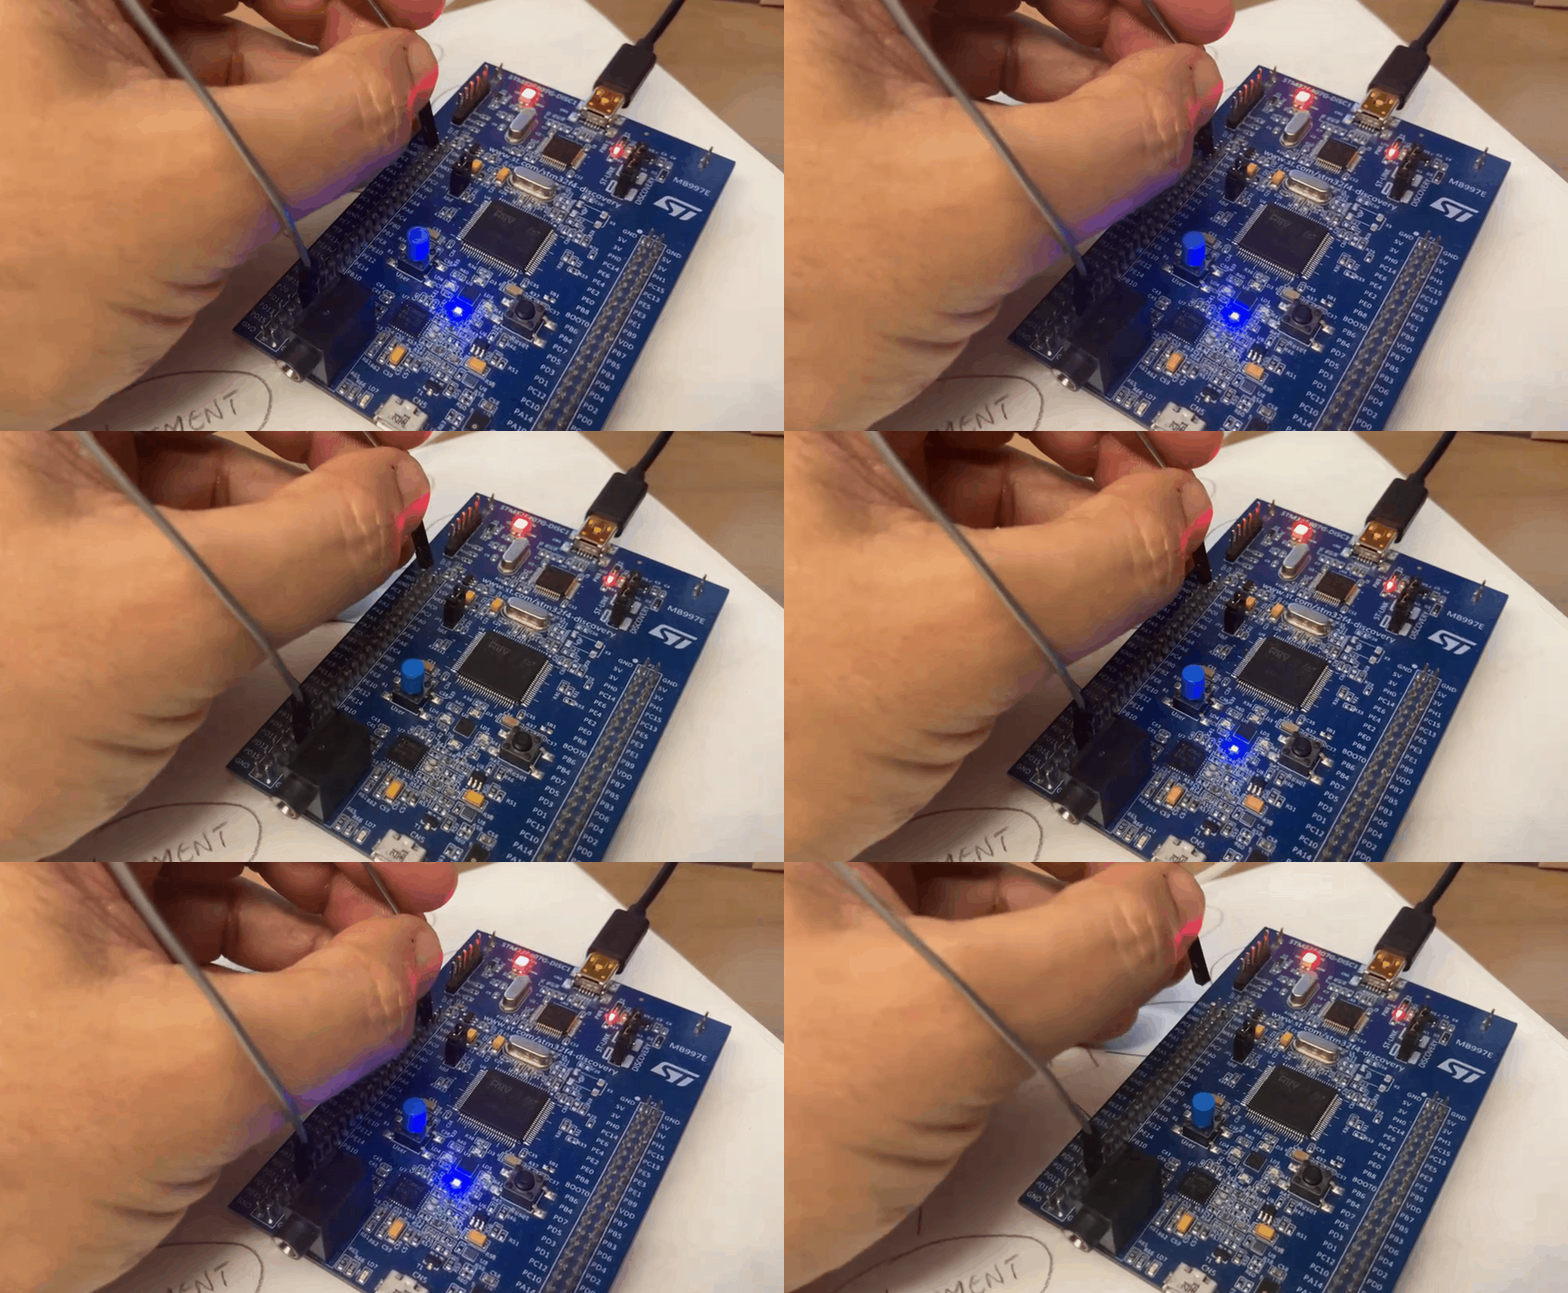
Have fun coding 🙂
GitHub Repository
None
References
None